Create React App From Scratch Part 2: Into Components

This article is part of the ReactJS series, you can find the previous part on the following link: Create React App From Scratch Part 1: Setting Up.
React Components
In the last lecture, we have mentioned the React components, and we have edited the App.js component. Now let's dive deeper into the components. React is everything about creating components, which are custom Html elements, where later we use them to build our ReactJS application. This App.js component which we saw in the last part of the Create React App From Scratch, is used into the index.js where we render it into the root element. Typically you render one root component, in our case the App component (but we can name it whatever we want) and inside of it, you will nest all other React components. The best thing about React components is that we can reuse them.
Note: You can render normal Html elements instead of React components.
Defining React Components
There are two ways to define a React component. The first way to define component is class-based, where we create a JavaScript class. The other way is function-based, where we create a JavaScript function.
import React, {Component} from 'react';
import './App.css';
class App extends Component{
    render(){
        return(
            <div className="App">
              <h1>Hello, World!</h1>
            </div>
        );
    }
}
export default App;
Class-based React component
The first way for creating React components is class-based were at the top we are importing the React and Component from the React library, after that we are creating JavaScript class and then we extend the Component class. Inside the class we have the render method, this method is important because React calls this method to render something on the screen, and inside the render method we are returning (rendering) some code. And at the bottom, we export the App class.
Note: The code inside the components looks like Html but it is called JSX. JSX is JavaScript that looking a bit different.
import React from 'react';
import './App.css';
function App() {
  return (
    <div className="App">
      <h1>Hello, World!</h1>
    </div>
  );
}
export default App;
Function-based React component
The second way for creating React components is function-based, basically is the simple JavaScript function which returns some JSX code, and it is exported at the end. Like in the class component we still need to import the React library at the top of the component, but here we don't need the component import. This is the simplest form, but the recommended way is the ES6 function syntax, which we will be using for creating the next components.
Note: We can do other stuff inside the components like connecting to the internet, doing calculations, listen to events, etc.
Creating a Layout Component
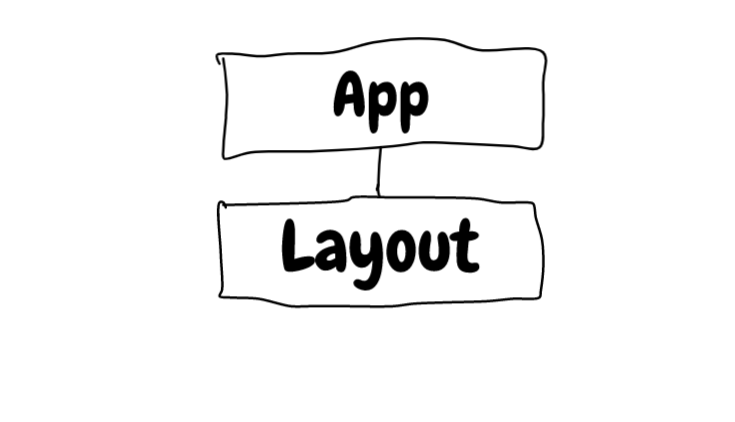
We have seen what are the components, but we still have just one compnent. Now let's start creating more of them. Firstly we will add the layout component, we want to use this layout component as a wrapper. It is fine even if we used the App.js becouse it is the root component. For now we want our component tree to look like this:
To start with, we want to have two new folders inside the src folder, components, and containers. In the components folder, we will be storing the presentational components that are not holding any state (we will look at the state later), and in the containers folder, we will be storing the state full components. Now we are going to create the layout component in the components folder because right now we don't need to manage any state inside of it. Inside components, we are going to create a subfolder named Layout, and inside we will create the Layout.js file. So we have nicely structured components in separate folders.
Inside the Layout.js we will create a functional component but now we will start using ES6 syntax as I said earlier. Firstly we will import the React library at the top, inside the component, first we need to create a parent div, because there should be one parent element in every React component, and at the top, for now, we will create just a placeholder div with the keyword toolbar inside it (later we might add more). Below that we will create the main element that we have from the Html, here we are going to output the component we wrap this layout, we will use {props.children}. With this, we can use this layout component as a wrapper around the content component. Lastly at the bottom we will export our component. And we got the following code:
import React from 'react';
const layout = (props) => (
  <div>
    <div>Toolbar</div>
    <main>
      {props.children}
    </main>
  </div>
);
export default layout;
Now we simply need to use this component in the App.js file. To use it we will import the component at the top, and then simply use it inside the parent div with some test paragraph, as the following example:
import React from 'react';
import './App.css';
import Layout from './components/Layout/Layout'
function App() {
  return (
    <div>
      <Layout>
        <p>Test</p>
      </Layout>
    </div>
  );
}
export default App;
Creating a Cryptocurrencies Container
Now let's make our Cryptocurrency component, which will actually be a container because here we will manage the state for the cryptocurrencies. We will create a new folder in the container folder which we will name it CryptoCurrencies, and inside that folder we will make our container component named CryptoCurrencies.js which will be class component becouse it is easier to manage the state. At the end it should look like this:
import React, {Component} from 'react';
class CryptoCurrencies extends Component {
  render(){
    return(
      <div>
        <div>Currency1</div>
        <div>Currency2</div>
        <div>Currency3</div>
      </div>
    );
  }
}
export default CryptoCurrencies;
This component is a list with Html elements as placeholders for now, but in the future that will change, as we will add components instead of them. Lastly we need to import this component to the App.js like we did with the last one. The App.js final code should look like this:
function App() {
  return (
    <div>
      <Layout>
        <CryptoCurrencies />
      </Layout>
    </div>
  );
}
And the components tree will look like this:
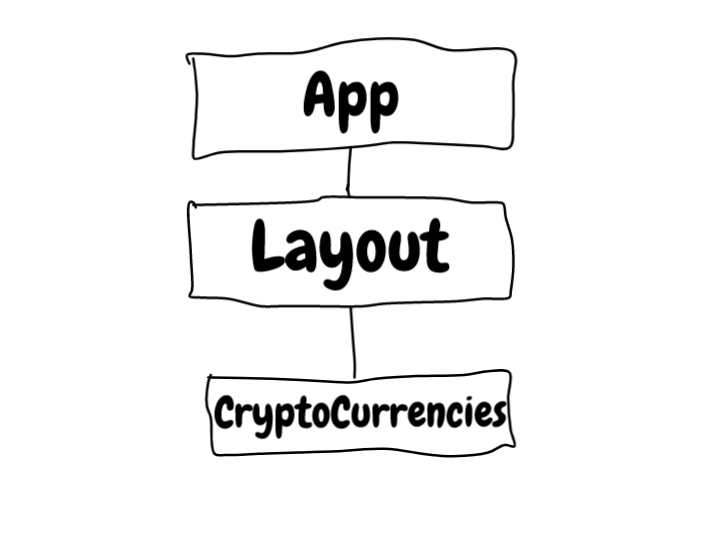
Now when we go to the localhost:3000 we can see our app, with the toolbar placeholder on top and the dummy list after. In later parts, we will apply styling to it and will look much better.
Part Overview
In this part we have seen, what is a component in React, the difference between class and function components. In the end, we created our first component the layout component which will be our wrapper around the other content, and the CryptoCurrencies component which is a list that will hold the future CryptoCurrency component.
To learn React much deeper, I recommend you to read this book:
The Road to learn React: Your journey to master plain yet pragmatic React.js.
If you prefer a video course, I highly recommend you to take a look at this course on Udemy:

The code from the course is available on GitHub: Create React App From Scratch on the branch: 02-into-components.
Next part: Create React App From Scratch Part 3: Working with Props
Tweet