Create React App From Scratch Part 3: Working with Props

This article is part of the ReactJS series, you can find the previous part on the following link: Create React App From Scratch Part 2: Into Components.
Adding Cryptocurrency Component and Accessing Props
In the last part, we talked a lot about React components and we have added two of them. Now we need to add one more React component, the cryptocurrency component, which will be rendered for every cryptocurrency we have on the list. We will nest all of the cryptocurrency components inside the container component called CryptoCurrencies.js.
To start with it, we will create a folder inside the components folder called Cryptocurrency, we are creating the folder here because this component will be presentational only (it's not going to manage any state). Inside our new folder, we will make a new React component called CryptoCurrencies.js, which will be again a functional component. Let's see how it looks in the next example.
import React from 'react';
const cryptocurrency = (props) => (
  <div>
    <span>{props.name}</span> | <span>{props.symbol}</span> | <span>{props.price}</span>
  </div>
);
export default cryptocurrency;
As you can see now we have added three span elements, which are temporary just for better formating, and inside we are using the props to access the data passed from the parent component which we will be adding next.
Note: The props argument is just properties passed to this component, and you can name it how you want to, but the name "props" is used as default.
Passing Props
Until now our components don't do anything in our app, also they are not holding any data, now we will change this. Before we are showing dynamic data fetched from a Rest API, we will test our app with dummy data. As we talked in the last part, our Cryptocurrencies.js component will be responsible for storing the data. Let's add some dummy data and see how it looks like in the next example.
import React, {Component} from 'react';
import Cryptocurrency from '../../components/Cryptocurrency/Cryptocurrency'
class CryptoCurrencies extends Component {
  render(){
    return(
      <div>
        <Cryptocurrency name="Bitcoin" symbol="BTC" price="7000"/>
        <Cryptocurrency name="Ethereum" symbol="ETC" price="125"/>
        <Cryptocurrency name="XRP" symbol="XRP" price="0.1"/>
        <Cryptocurrency name="Bitcoin Cash" symbol="BCH" price="180"/>
      </div>
    );
  }
}
export default CryptoCurrencies;
Firstly we have added new import which is the new component we have created at the beginning called cryptocurrency, and inside the cryptocurrencies container, we have added a couple of new components with some dummy data that we will render inside them, which they are accessing through props.
Note: In React when state changes, the component will re-render and will show the new state.
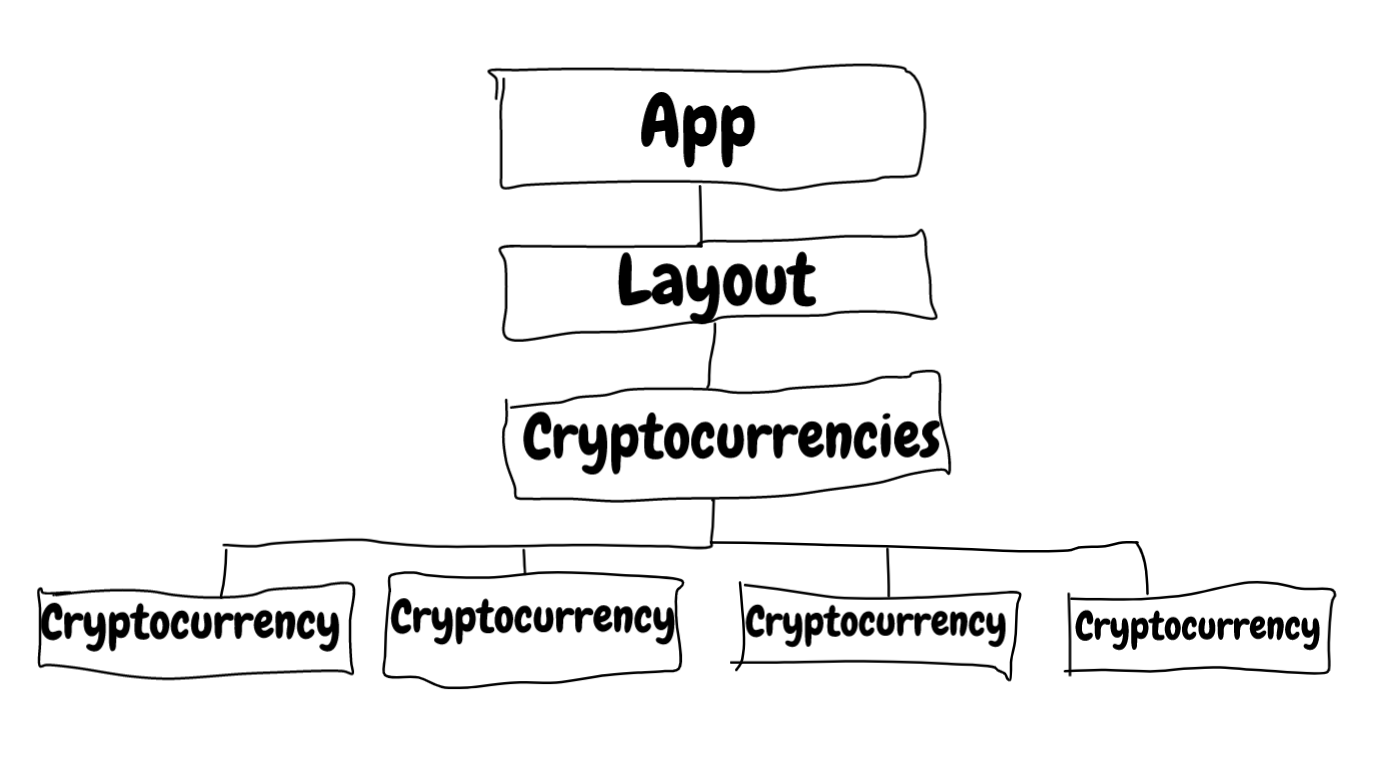
Now our components tree look like this:
Note: For now, our components have just a basic look, but we will style them later in the series.
Part Overview
In this part, we have seen more on components to React as we created one more component called Cryptocurrency. We have also seen what is props and how we can pass it or access inside of our components.
To learn React much deeper, I recommend you to read this book:
The Road to learn React: Your journey to master plain yet pragmatic React.js.
If you prefer a video course, I highly recommend you to take a look at this course on Udemy:

The code from the course is available on GitHub: Create React App From Scratch on the branch: 03-working-with-props.
Next part: Create React App From Scratch Part 4: Styling Components
Tweet